Montech Has Done It Again! King 95 PRO Case Review
- A2K
- Dec 12, 2023
- 6 min read
In our latest review, we delve into Montech's new offering in the PC case market, the King 95, available in both standard and Pro models (the Pro model includes pre-installed fans and ARGB controller).
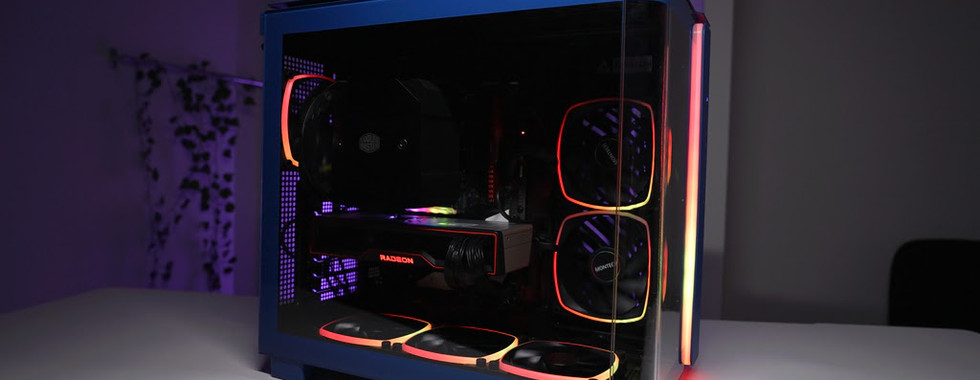
It’s easy to notice that the King 95 incorporates elements reminiscent of the Lian Li O11 Dynamic, particularly its dual-chamber layout which separates the power supply and drive section from the main front chamber. It also draws inspiration from the Hyte case, notably in its all glass window. Available in four colour options – black, white, blue, and red – the case's fit and finish are pretty intriguing. The panel, for instance, is plastic but boasts a brushed look that not only appears aesthetically pleasing but is also practical, reducing the visibility of scratches over time, especially around the USB ports.
While checking out the general features, I discovered a very unusual design feature - the wavy line pattern on the top and side of the case. This pattern creates an optical illusion, appearing straight from one angle and distinctly wavy from another, adding a unique visual twist to the case's design. Montech has moved away from standard mesh designs, opting for a tool-less approach where all panels, including the top one with a dust filter and push-pin connectors, are easily removable.
The side panel comes off without tools as well, revealing yet another mesh across the entire panel. The bottom dust filter, also spanning the entire size of the case, is a bit more flexible but finely constructed and easily slides into place.
The side glass panel is split into two separate panels, adding to the case's modularity. But if you are not too bothered about all-glass look, the front panel is interchangeable with a mesh front panel included in the box for those who prefer enhanced airflow over aesthetics.
The case's interior offers ample space, made even more accessible with all panels removed. The Pro version's main distinction lies in its six pre-installed fans – two 140mm fans on the side and four 120mm fans, including three at the bottom and one exhaust fan at the back. The fans' orientation can be adjusted, which we will explore more in the performance section.
Regarding additional mounts, there's space for a 360mm radiator or three 120mm fans at the top. Alternatively, two 140mm fans can be fitted, with the entire panel removable for easy assembly. The case also accommodates a 240mm or 280mm radiator on the side, with considerations for clearance to avoid interference with other components.
Included accessories add further value, such as a detailed manual and a well-organised box of labelled screws and brackets.
The case's capacity to support up to eight 3.5-inch hard drives is impressive, offering flexibility for extensive storage setups. At the back there is room for dual power supplies or additional drive storage, featuring an easily accessible hinge mechanism. The panel also supports two full-size hard drives and three SSDs simultaneously. Cable management is facilitated by ample space and a pre-wired fan and ARGB controller, simplifying connections to the motherboard.
- - - - - - - - - - - - -
Having completed the build, I am happy to report that it was surprisingly straightforward. The case looks really good, and Montech has actually incorporated several thoughtful quality of life features. The first one is the aforementioned labelled screw organiser. This little detail greatly simplifies the building process, and makes it especially convenient for those who are new to this. Having labelled screws can prevent a lot of common issues, and any unused parts from the initial setup can be neatly stored away for future use.
I appreciate the inclusion of a door at the back of the case for its utility in concealing cables and providing extra space for drives. However, it can be somewhat cumbersome during the building process. When opened, the door tends to flap around, which can be inconvenient, especially since I prefer to set up the PC while it's lying flat on its side on the desk. I wish it had a little retention mechanism just to hold it in place when turning the case around. Additionally, when the case is in an upright position and you're connecting cables, it becomes a choice between reaching through the door or going around to route the correct cables. While these are minor points, they're worth mentioning for someone considering this build.
For those who prefer building their PC with the case in a vertical orientation, you'll appreciate the middle standoff feature in this case. It conveniently holds the motherboard in place, making it easier to screw it in securely.
As for cabling, the case has plenty of access points all around, each outfitted with rubber grommets. It's typical for larger cables to occasionally dislodge these grommets, but they're not overly difficult to put back in place. Once all the cables are organised the case does look really clean. There is even enough space to plug in the top power cable after the fact, but if you plan to use fans or radiator at the top - I would recommend doing the power and other cables on the motherboard first.
Another feature I'm particularly fond of is the large cable ties at the back. They're great for compressing cables if you're tight on space, but you'll likely find that to be a rare necessity, given the generous amount of room available in this case.
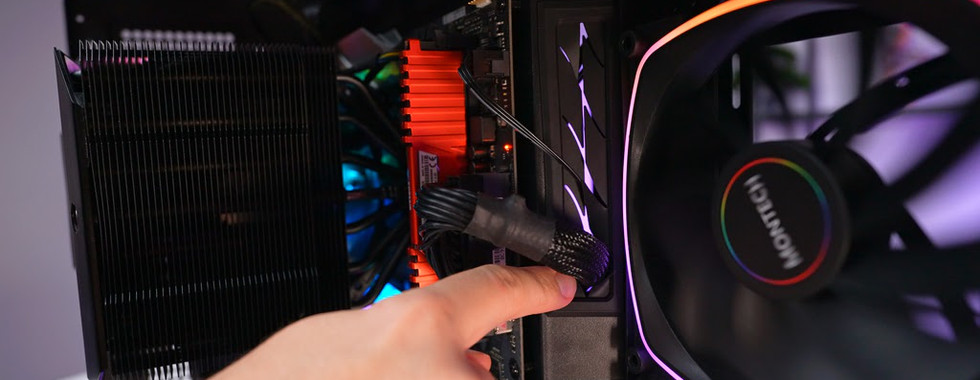
One thing that really stood out to me is the front header connection. Montech went as far as making it into a solid block and I love it. Normally, plugging in the front header can be one of the more tedious and fiddly parts of a build, but in this instance, it was remarkably straightforward and hassle-free.
The other thing that was surprisingly easy is the side/front fan conversion. All you have to do is remove the front most bottom fan, remove two thumb screws, then move the bracket and secure it in two locations. Bottom one is obvious, while for the top, there's a small bracket that becomes accessible once you loosen a screw. After that you can screw in the front bottom fan. Impressively, I managed to complete this entire process in about two minutes, without the need to adjust or unplug any cables. If you're using a larger graphics card, you might need to remove it first to make space. But even with this extra step, the process remains uncomplicated and user-friendly.
Moving the fans to the front of the case also means it is best to utilise the mesh front for optimum airflow. Personally, I find myself liking the look of the mesh front over glass.The joint in all glass setup doesn't entirely win me over.
As to pricing, Montech has gone pretty aggressive here, starting at 109 USD for the non PRO version and 149 for the PRO. There's a bit of a premium for the coloured options, but overall, it's not excessively priced.
Now off to performance and here it is not doing too great as compared to more airflow focused cases. In our noise normalised 40 dBa test it hits low 60s above ambient on both CPU and GPU.
When we remove the limits and set fans to 100% it hits 51 dBa which is exactly the same as 903 Max but is still on a toasty side. One thing I found interesting though, the fan pitch is not annoying whiny type but more of a forced wind type which is not as bad as I expected.
With all of this in mind, I am actually still rather impressed with the King 95 case from Montech. You are getting a nice looking case at a pretty good price and to be honest the PRO version is probably the way to go as it includes 6 fans that do a reasonable job, look nice and already are prewired in. This means you just need to connect the Fan and RGB headers to the motherboard, and you're all set. Interestingly, this is the second Montech case I've reviewed, and both have stood out as excellent value propositions. For those looking for a more budget-friendly option, I recommend checking out our review of the Air 903 Max.
I'm curious to hear what you think of this case. Do you see it as a worthy competitor to the likes of Lianli and Hyte cases? Share your thoughts in the comments.


Commentaires